
|

|
The following is a basic four-step process for patching you cast stone product.
|
|
WHEN TO PATCH:
- Damage that can be easily seen from 20 feet away should be patched. Corner chips that are �� or less in width do not normally require patching.
- The air and stone temperature should be above 40°F during, and 24 hours after patching. Patch during the morning hours on hot days and avoid patching when the temperature is above 90°F.
TOOLS/MATERIALS:
- Patching material - (The best method is to grind up some leftover stone from the same jobsite, especially for small chips or cracks. We can supply you with matching sand if this is not feasible.)
- White acrylic liquid bonding agent.
- Mixing containers.
- Water
- 2 spray bottles
- Wooden or plastic wedges or trowels
- Sponge
- Damp rag
PROCEDURE:
- Test patch a piece of leftover stone and get approval before continuing on the rest of the job.
- Mix a small amount of patching material (3 parts sand/1 part mix) with only enough water to make a zero slump mix.
- Add a small amount (approx. 1 tablespoon) of the bonding agent. Do not use as a substitute for water. This mix should be as dry as possible. It should have just enough water so it can be compacted in your hand like a dirt clod. Mix for 4 or 5 minutes.
- At this point, the color of the patch mix should be close to the color of the stone when wet.
- Drench the patch area and surrounding stone surfaces with water in a spray bottle.
- Spray some bonding agent on the patch area and let stand for 5 minutes.
- Press the patching material into the damaged area with a wooden tool or trowel. For large holes, compress the patch material onto the wooden tool before applying. When the patching material is over 20 minutes old, replace with fresh mix.
- Smooth the patch with a wooden tool. Use the least amount of strokes as possible. Too much tooling will create a slick surface. Leave a little extra material on the patch.
- After initial set, burnish the patch with a sponge, sandpaper, piece of carpet or anything that will create a sugarcube finish. Some trial and error may be required.
- Cover the patch with a damp cloth or piece of plastic for 24 hours.
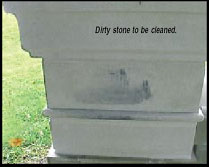
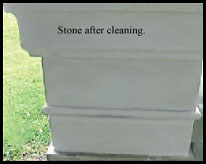
- Wait 5 days and wash down with a masonry stone cleaner.
- A good patch will not match in color right away and will usually appear lighter. Over the next 3 to 12 months, depending on the climate, curing, weathering and ultraviolet bleaching will blend the color of the patch into the surrounding area.
|
Advanced Patching Techniques (PDF)
|
 |
|
For information about PROSOCO, Inc. and ChemProbe, Inc., contact the Stone Legends sales staff at 1-800-398-1199. |
|


